I have already posted a couple pictures to our Instagram account, but since I’ve had a few questions/comments, I thought I would make a quick blog post on these easy DIY projects which give a lot of bang-for-your-buck! Don’t get scared, this is SUPER easy and we think it adds a lot of nice ambiance for a small monetary or time cost. If you’re like the average RV’er who has learned to wear many Mr/Mrs Fix-It hats, this will be a piece of cake!
This all came about when we began to broaden our outdoor lighting repertoire. One big attraction to the RV lifestyle, for us, is the ability to spend a lot of time outdoors. This is mostly because we always seek out nice weather environments, and living in such a small space, being outdoors is attractive so that we keep our sanity.
Outdoor
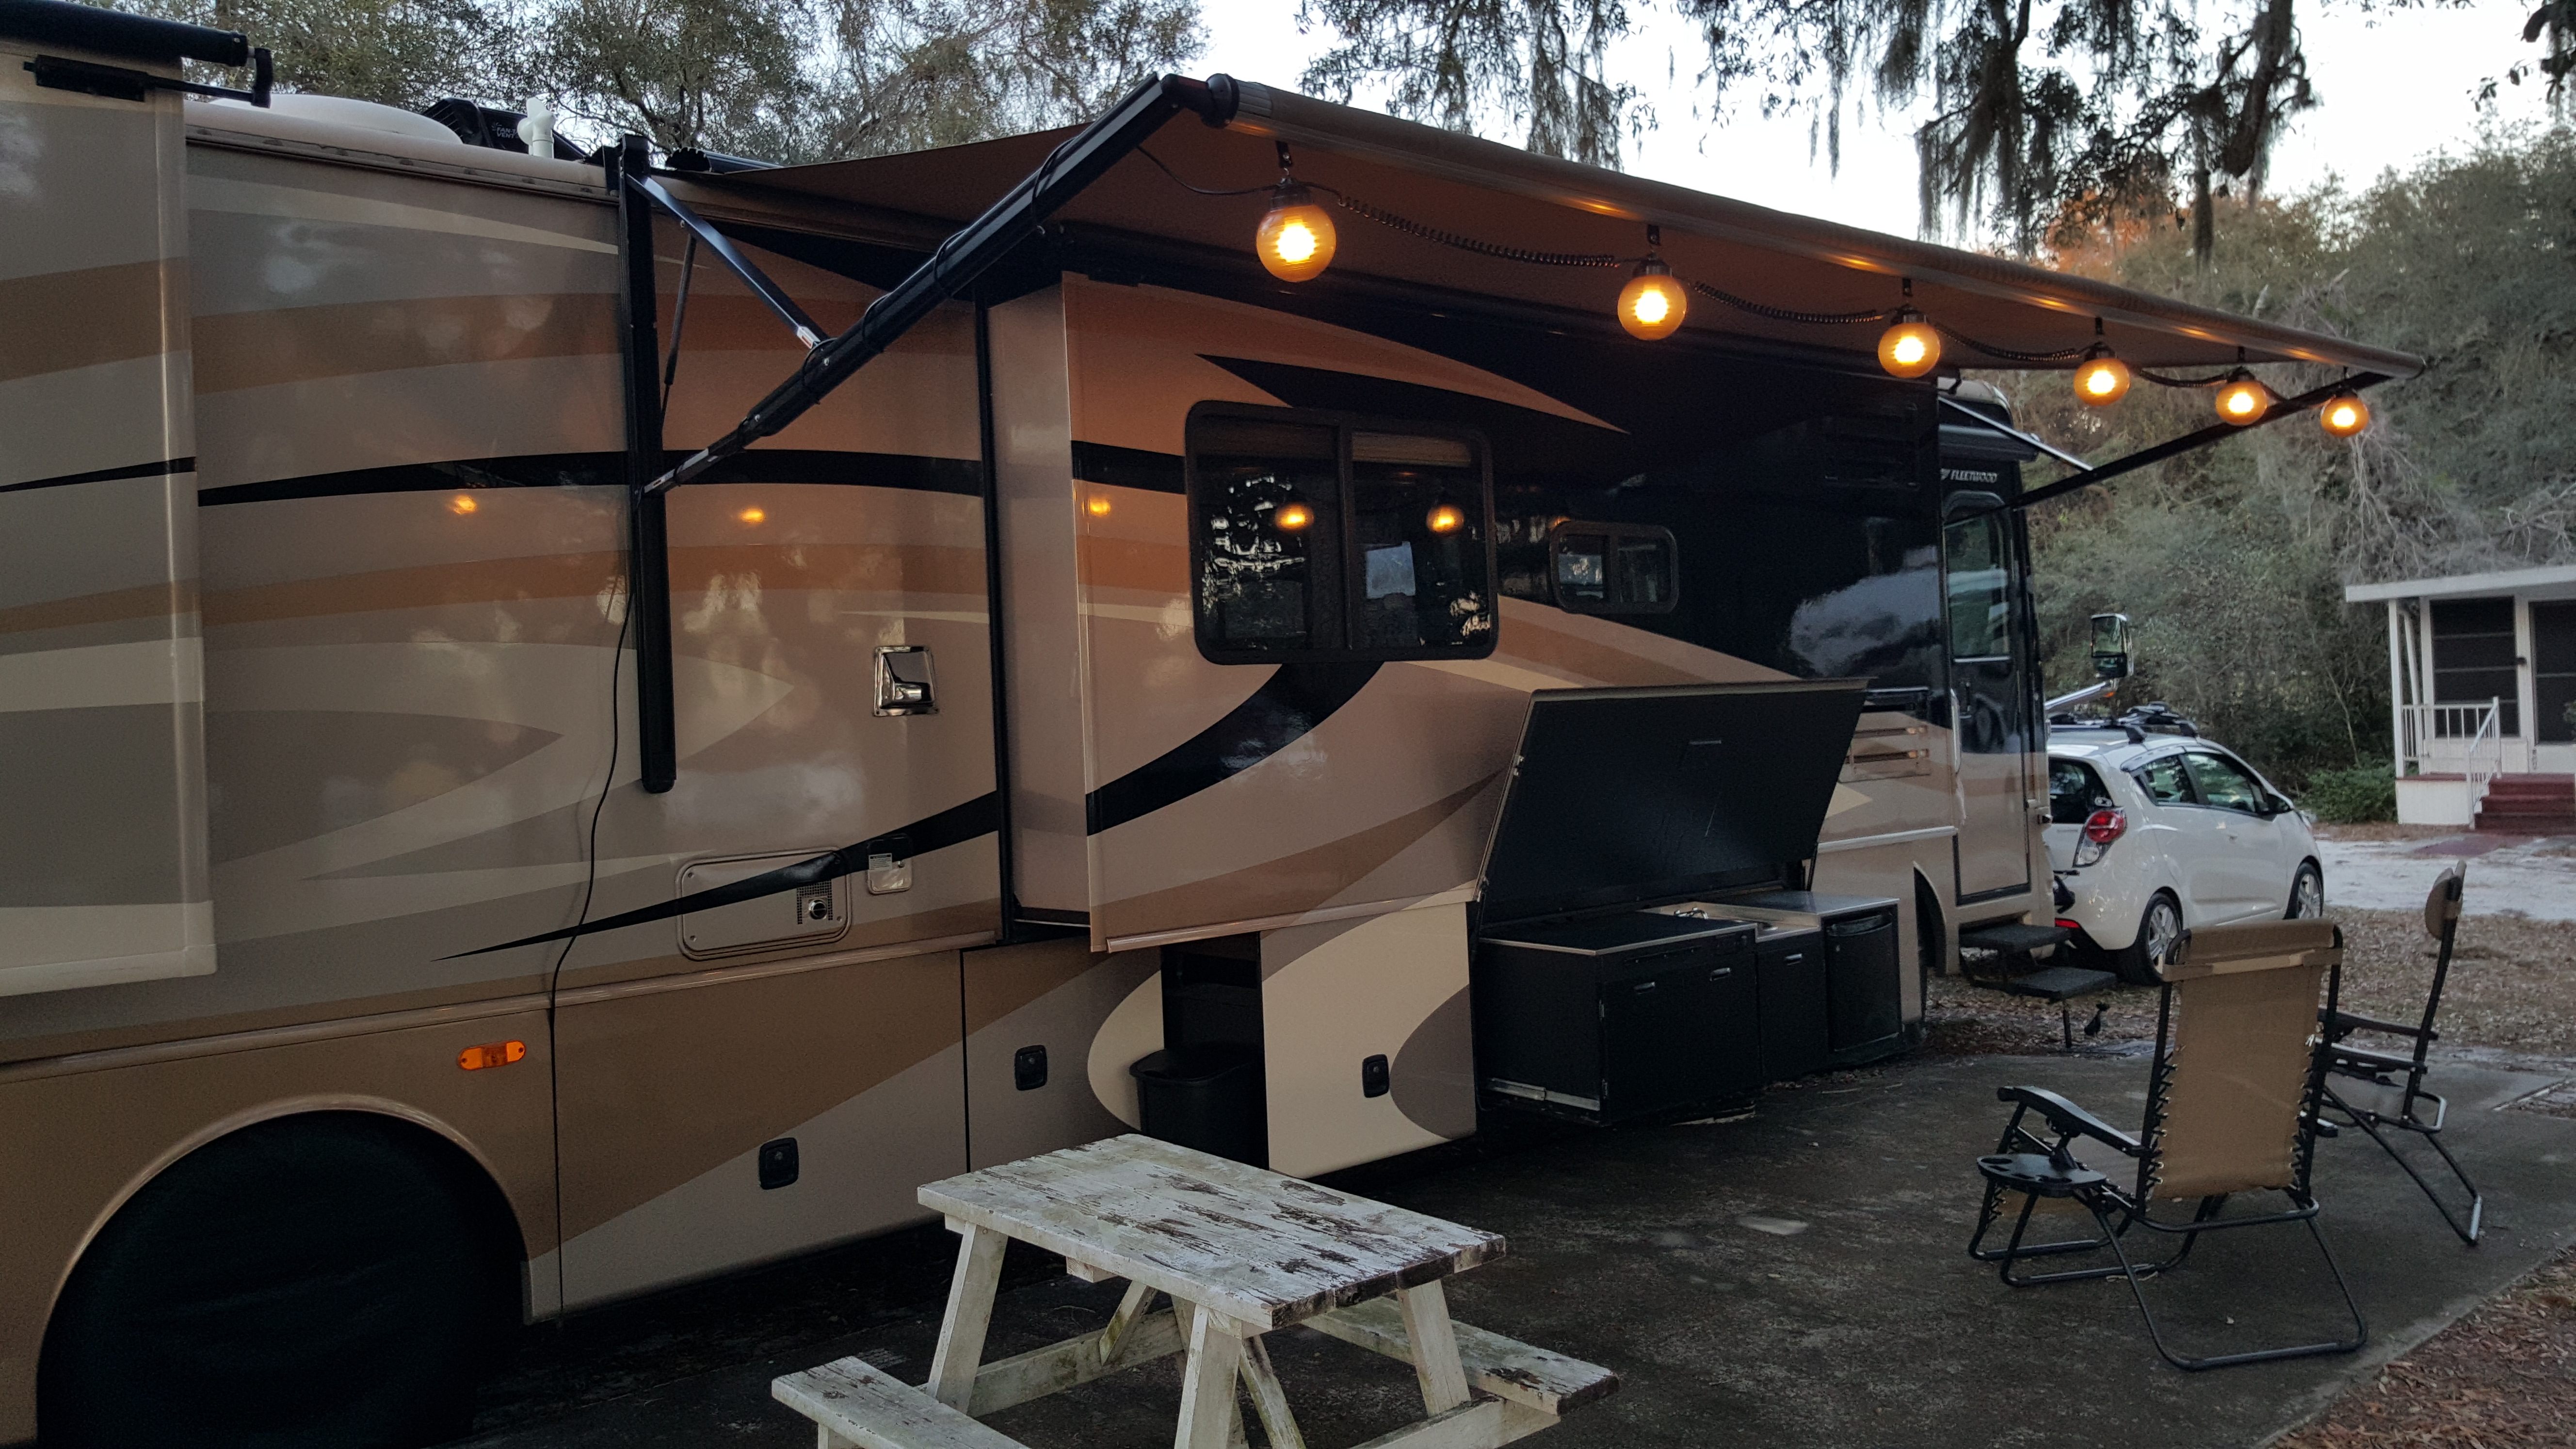
We initially purchased a string of six large bronze etched globe lamps. These are pretty popular in the RV community and come in a variety of colors. We hung them from our extended awning using Camco fabric party light hooks that slide into the accessory track of the awning roller tube. I liked these hooks more than others because they can be rolled up with the awning. One complaint I’ve read is that the metal eyelets on these hooks are not stainless, so they will rust and could leave rust rings on your awnings when it’s stored. To combat this, I coated the eyelets with clear nail polish. Back on topic now, I installed Cree dimmable 60W equivalent LED bulbs into the globes and also hooked them up to a dimmer switch. We really LOVE these lights. They’re high quality and they look great! Our sole issue is that they are only used when the awning is out. Being an electric awning, we’re very cautious keeping it out and the potential for a gust of wind to really ruin our day. So we don’t leave it out for extended periods of time when we can’t monitor it (without creating premature ulcers). If you have a system to securely anchor your awning, or it doesn’t stress you out as much as is does me, then these lights are highly recommended by us!
Looking for something that would not be awning dependent, I began looking for home, outdoor lighting. I kept seeing the same string lights, listed under many different brand names (Deneve, Feit, Brightech, Smith & Hawken, etc). They always seemed to get very high reviews, but I was still uncertain if they were the right ones for us. One day while looking at Target’s website, I saw that they also carry these same string lights (branded as Smith & Hawken) and they were in stock nearby. I made the run into town and took a look – they were definitely high quality and lived up to their billing as commercial lights,  so I purchased two, twelve foot strings. The other variable that I kept seeing was the length of the string and the spacing between lights. To this day, Target is the only place I’ve found the ten light, twelve foot strings (one foot spacing between lights). There are many 48 ft strings, with three feet spacing and a few 24 ft strings with, two feet spacing available on Amazon. Despite the different spacing and length, I feel quite certain all these lights roll off the same exact manufacturing line in China.
Along with two new light strings, I also picked up a fifteen foot black extension cord (to match the black cord of the lights) and an 84″ shepherd’s hook. Using heavy duty zip ties, I secured an end of each string light to one end of our curbside slide using the awning topper brackets. Then the lights go out to the shepherd’s hook to create the desired effect. The extension cord is run down to a basement storage bay that contains a 120V outlet. I also added a remote power switch so we wouldn’t have to unlock/lock the bay each time we wanted to turn the lights on and off. (Important: make sure to secure where the two strings plug together – I used black duct tape – otherwise, if they come unplugged, the lights will crash into the ground – big mess!!)
All said and done, the lights look fantastic! They do droop a little lower than I’d like when they get
closer to the shepherd’s hook, but we place our chairs under there to keep us from walking into the light strands. Having a taller shepherd’s hook wasn’t plausible due to storage restrictions (I’m open to ideas though!). These light strands can be put on a dimmer, but we found the full brightness to be great when we’re outside. If we intend to use them as an unattended porch light, I would dim them down for our neighbor’s sake.
One consideration of our non-awning-dependent string lights is that they’re not LED. They use somewhat specialized “vintage” bulbs, which look great, but are very expensive in LED form – especially when you need twenty of them. So for right now, these are a “hook-up only” luxury.
Indoor
After the success of our outdoor lighting projects, I set my sights on the indoor space. I got to thinking, “why can’t we have that same string light atmosphere inside too?” Well, there are many things to consider, but after doing some measurements, I felt confident that I could make it work!
For this project, I purchased two 25 ft indoor/outdoor string lights, a pack of “mug hooks”, a six foot indoor extension cord, and another dimmer switch. I originally was thinking of going from the top of each living space slide, but then decided to use the crown molding at the top of the coach for maximum vertical clearance. Our coach has an interior ceiling height of 84″. I am 6’4″, so these lights needed to not hang any lower than eight inches from the ceiling. So, in addition to purchasing fairly compact lights, I also needed them to be fairly taunt from side-to-side (not drooping in the middle). Knowing the total length of the light string (50 ft), and measuring the width between the crown moldings, I decided to do five passes with the lights. Knowing the distance I needed each pass to go, I began screwing my “mug hooks” into the wooden molding. Measuring twice (sometimes three times) and screwing in once, I got all six of my hooks installed. Next, we simply strung up the lights, attached the extension cord and dimmer, and lit them up!
 I had never seen this done and only had an image in my head, so I was guarded on how they would look. Honestly, they came out better than I even anticipated. I was able to hide the extension cord on the side of the slide and set the dimmer in an inconspicuous spot. It doesn’t look like it came from the factory like this, but for the time, effort, and money spent, it looks pretty damn good – we think. We use them each night, normally at a very low setting. With 50 bulbs total, full brightness is very bright!
 Again, similar to our second set of outdoor lights, these are incandescent bulbs. Upgrading all 50 bulbs to LED would nearly quadruple my investment. So these are another “hook-up only” treat. I do take them down when we move, although if we were very careful, I think the slides could come in with them up. With it only taking about three minutes to take them down, it’s not worth the risk of arriving with broken glass everywhere. When they’re down, the only remaining pieces are the small hooks in the crown molding. They are virtually invisible unless you were really looking for them. If we decide to ever take them out, the small holes could easily be filled with wood filler and you would never know they were there.
 I hope this gives a good description of where our latest light adventures have taken us! Maybe it can help you to add a little “Tuscany flair” to your rolling home as well!!
Cheers,
Ryan, Kim and Jet